Dessert

SHE Thinks Easter (Last Minute)

Thursday, April 13, 2017

Hey y'all! So as I'm sure you know, Easter is Sunday. AKA three days away! 

In true slacker form, I've not done a thing as far as decoration, crafts, or baking! Oops! 

I quickly scanned Pinterest for "quick easy Easter" - below are some cute ideas I found that I thought I'd share with you!

So how cute is this bunny garland? I love the little cotton ball tails. 

Image via Pinterest

These eggs are a great way to add a little extra decoration without having plastic eggs laying around. This would also be fun for the kids to help with if they were a little older!

Image via Pinterest

I think this button egg is my favorite! So cute, so easy, and so many possibilities!! 

Image via Pinterest

I love this snack because it's festive, sweet (peeps), and healthy (fruit). A win-win for everyone!

Image via Pinterest
Finally - you can't go wrong with Rice Krispy's! Add some food coloring to the melted marshmallows before you add the cereal and shape like eggs for these cute and yummy treats!

Image via Pinterest


Hope this helped get the creative juices flowing if you're like me and haven't done a thing. 

Happy Easter!

xo Courtney

SHE Thinks Easter (Last Minute)

Thursday, April 13, 2017

Happy Fall Y'all!

Thursday, September 22, 2016

image via Google
Happy first day of fall! Now I know, it's 875 degrees outside so it certainly doesn't feel like fall, but I want to talk about it anyway.  With fall comes chilly weather, soups, s'mores, and football. If Christmas was during fall it would definitely be my favorite season.  To kick off this great season, I wanted to give you a variety of fun fall things!

These are my favorite soups that I will make a couple times before it gets warm again (some I've already made this month)!


You're also going to need some go-to desserts. S'mores is a great option and I love mixing it up by using Reese's instead of regular chocolate bars, but sometimes you need a few others. Here are some of my favorites!


And finally, some of my fall bucket list items for the year:

Go to a pumpkin patch

Carve those pumpkins

Sit around a bonfire

Eat s'mores around that bonfire

Drink apple cider

Play in the leaves

Sit outside and enjoy the crisp air (whenever it finally shows up)

Unplug for a weekend at a cabin in the woods (no TV/cell phones, just beautiful leaves and relaxation).

Attend a couple of fall festivals!


Do you have anything you would add to any of these lists? I'll love to know.

xo Courtney


Happy Fall Y'all!

Thursday, September 22, 2016

SHE: Eats Dessert

Tuesday, September 6, 2016

Hey Y'all! Recently I've attempted to make healthier choices when it comes to eating. Watching my portions, incorporating more fruits and veggies, and slowly eating fewer processed foods is the route I've taken. But there are times when a girl just wants dessert! To that I say - EAT IT! As I was browsing Pinterest, I came across this 3 ingredient recipe that was, honestly, delicious! Here's how it goes.

To start, grab two boxes of cake mix. As I mentioned before - slowly, cutting out processed foods. It's important that one of the cake mixes be Angel Food cake, and the other can be your choice. I grabbed these two:
Image via Google
Image via Google
Next, combine both cake mixes in a mixing bowl and whisk together until evenly combined. Once mixed, pour in to an airtight container or a gallon resealable bag. I used a bag, for easier storage.

In a microwave safe mug, add 3 Tablespoons of the dry cake mixture and 2 Tablespoons of water. Mix until blended. At this point, I added a bite-size Hershey original bar to make it more of a molten cake, but that's optional.


Heat in the microwave for 1 minute, and enjoy! Depending on what flavor cake mix you use, you can get creative with the toppings and variations of your mug cake. 


The texture is airy like Angle Food cake, but cures the chocolate cake craving 100%. Making a single serving of the cake won't leave you tempted with an entire cake, and only takes 1 minute!

Enjoy!

xo ~ Brittney

SHE: Eats Dessert

Tuesday, September 6, 2016

SHE Cooks: Easiest Apple Strudel!

Thursday, June 16, 2016


Hey y'all! I'm not sure if you know this or not, but tomorrow is apple strudel day! I'm a huge fan of just about any apple dessert and strudel is no different! So today I'm sharing a recipe that not only has a few ingredients but is literally the easiest dessert you'll ever make! 

To make the strudel itself you'll need one package of crescent rolls, one can of apple pie filling, and some brown sugar.


Lay the crescent rolls out and pinch all the seams together. Flatten it out some either with your hands or a rolling pin. Cut strips on each side about an inch wide leaving about two inches in the middle for the filling. I failed to take a picture of this part, but you get the idea in the picture below. Spoon the pie filling into the middle and start folding over the pieces as seen below.


It doesn't have to be pretty!


Sprinkle a little bit of brown sugar on top.


Bake at 375 for about 15-17 minutes, until golden brown.

Optional step:

I chose to add a glaze on the top of mine when it was done. Simply mix together 1 cup of powdered sugar, 1 teaspoon vanilla, and two tablespoons of melted butter.


When its mixed it together it will be thick and clumpy. Start adding water a little at a time until you reach the consistency you're looking for.


Then just drizzle on top! Doesn't that look good?


Slice it up and enjoy!


What's your go-to strudel recipe? I'd love to add it to my collection.

xo Courtney

SHE Cooks: Easiest Apple Strudel!

Thursday, June 16, 2016

Gingerbread Cookies!

Friday, December 4, 2015

 
Happy National Cookie Day! What a glorious day this is! I love all kinds of cookies, but this time of year my favorite is definitely gingerbread.
 
This year I tried out a new recipe. It does not require any chill time (yay!) and the dough holds it's shape while baking. I mean what is better than that? Let's get started...
 
 
You'll need to gather your ingredients, I've listed the recipe at the bottom. Mix your flour, salt, and spices and set aside.

 
In your mixer, cream together your butter and brown sugar. Add the egg and mix until incorporated. Add the molasses (my favorite part of these cookies - I love the way it smells!!), and vanilla. Slowly mix in your flour until it is all mixed in.

 
Lay out some wax paper and spread some flour on it. This will be your work area to roll out your dough.

 
I like to work in small chunks of the dough instead of all at once. I personally think it makes it easier, but you do what is best for you!

 
Roll your dough out to about 1/4 of an inch.

 
Now for the fun part - cutting out your cookies!!


Then gather up your scraps and roll them back out and cut some more.

 
I also like to make some plain ole round ones. I wanted bite size and didn't have a cookie cutter small enough so I improvised with the top of a shot glass. This will work with any glass you have.


I failed to get a picture making the icing - I was too excited!! But I've got the recipe for you at the bottom.
 
 
Decorating the cookies are my favorite part. Get creative! You can also add food coloring to the icing if you want different colors.

 
See my SHE cookie for the blog?

 
I hope you make these and love them as much as I do!
 
Recipe
 
Cookies
3 Cups All-Purpose Flour
1/2 Teaspoon Salt
1 Tablespoon Ground Ginger
2 Teaspoon Ground Cinnamon
1/4 Teaspoon Ground Cloves
6 Tablespoons Unsalted Butter, Room Temperature
3/4 Cup Dark Brown Sugar
1 Large Egg
1/2 Cup Molasses
2 Teaspoons Vanilla
 
1. Preheat oven to 375 F.
2. Whisk the flour, salt, and spices together in a bowl. Set aside.
3. In your mixer's bowl, cream together the butter and sugar until they've just come together. You don't want it too fluffy.
4. Add the egg and mix.
5. Add the molasses and vanilla. Mix until incorporated.
6. Slowly mix in the flour mixture until your dough forms.
7. Roll out on a lightly floured surface until your dough is about 1/4 inch thick. Bake for 8-9 minutes. (I would start checking after five minutes. My round ones were perfect after five. The gingerbread men were too dry after eight minutes so next time I'll do six or seven. It all depends on your oven.)
8. If you're not immediately making the cookies, wrap the dough in plastic wrap and refrigerate (or freeze) until you are ready. Before using, make sure the dough is room temperature.
 
Icing
1 Cup Confectioners Sugar
2 Teaspoons Milk
2 Teaspoons Corn Syrup
1/4 Teaspoon Almond Extract
Food Coloring (optional)
 
1. Add confectioners sugar to a mixing bowl and with a wire whisk start mixing on low.
2. Add the milk, corn syrup, and almond extract and whip until smooth.
3. Add more corn syrup if it is too thick to use, but be careful not to add too much or it will run right off the cookie.
(you may need to double the recipe, so make sure you have enough of the ingredients in your kitchen!)


xo Courtney

Gingerbread Cookies!

Friday, December 4, 2015

Icing a Cupcake

Friday, November 27, 2015

Hey everyone! Happy Black Friday! Did you go shopping today? I didn’t – I’m choosing to sit on the beach instead. It’s a pretty good trade off!
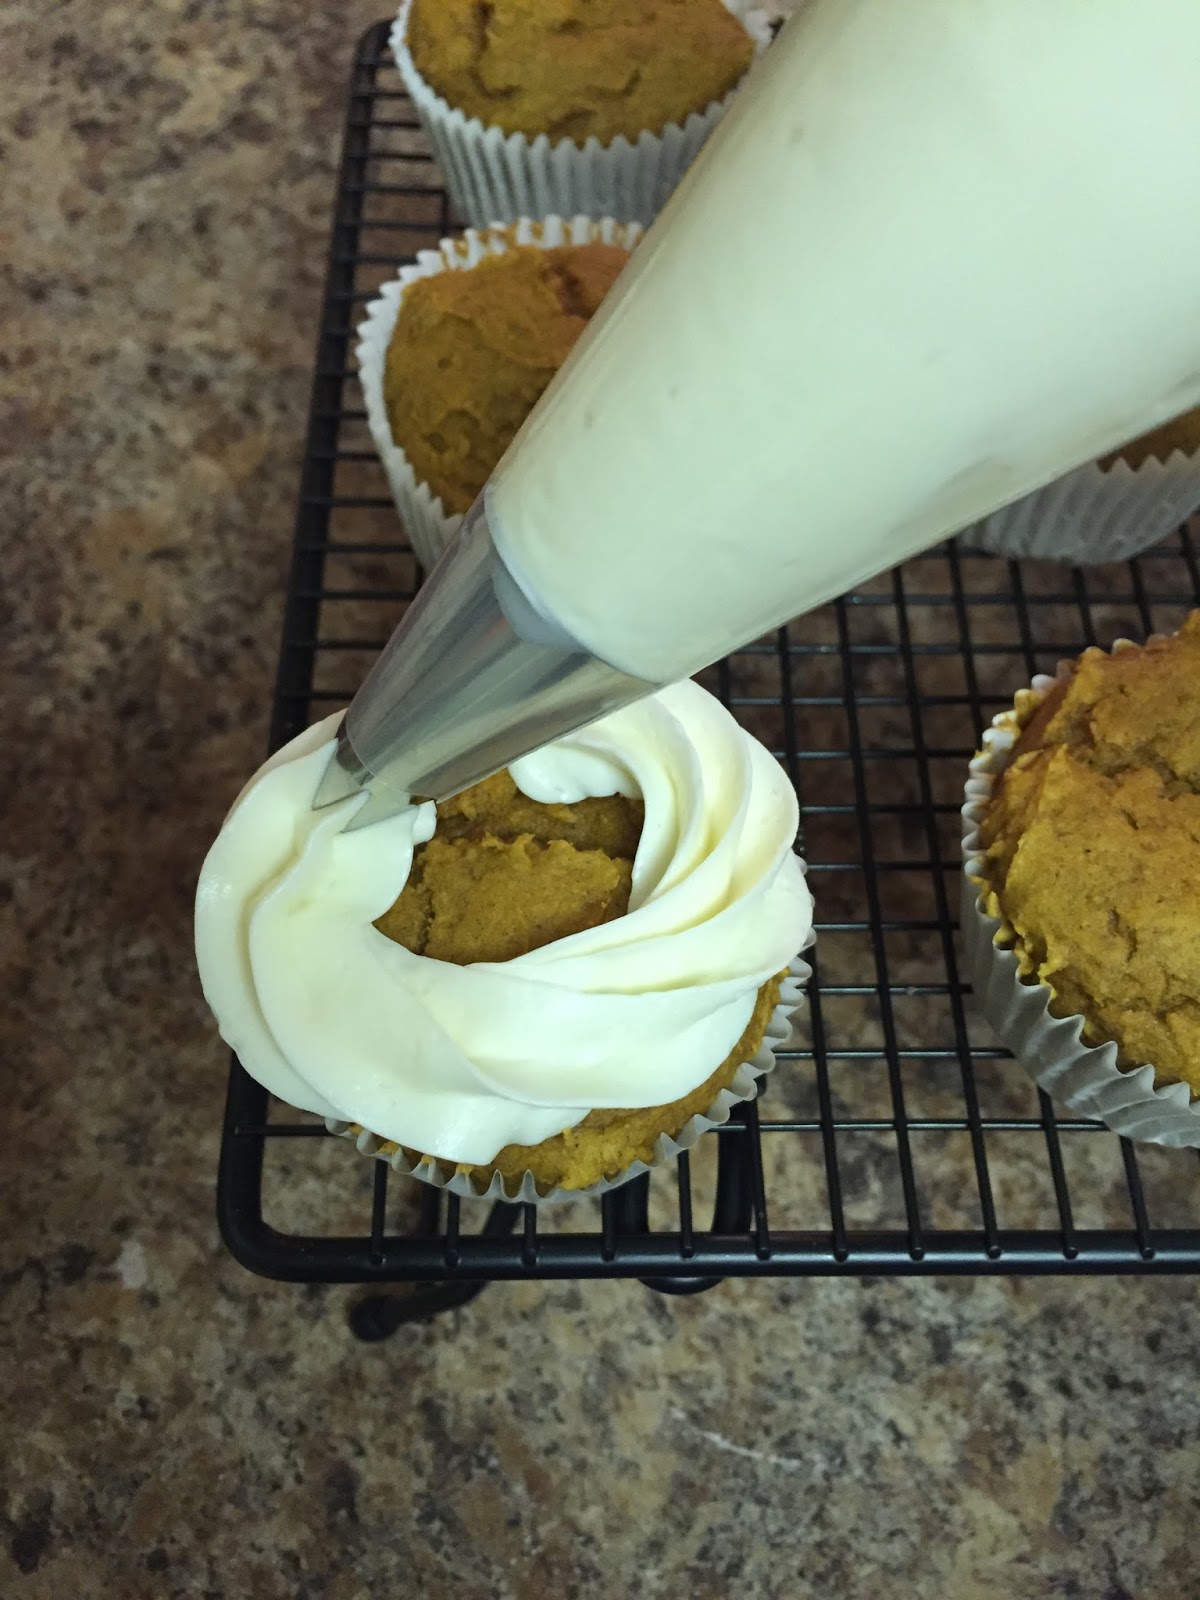
Today I’m going to show you just a quick tutorial on icing cupcakes with an icing tip.
First let’s start with what you need:
  • Icing (duh)
  • A bag - I used a disposable decoration bag, but a gallon size zip lock bag works too!
  • Icing tips. The three tip set in my picture was $3 at Walmart!
  • Coupler (not pictured) - the coupler helps secure your tip in place on the bag. I forgot to grab one. They're helpful to have, but obviously not a complete necessity.  

Alright now you need to pick which tip you’re going to use. I used tip 1M, it’s this one that looks like a big open star.

Drop your tip into the corner of your bag and cut open the corner. You want to make sure the hole is big enough that the bag won’t block any of the icing coming out, but not so big that the tip will fall out when you’re icing. That would be tragic! Now fold down the top part of your bag (see the picture below) and fill it up with your icing.
The point of folding it down was to keep the top of the bag clean so it is easier to ice.

Now we are ready to get started. Twist the top of your bag closed and hold it at the top like this… 
Start on the outside of your cupcake and work your way into the middle, applying light pressure to the bag. The icing will come out pretty easily so you don’t want too much pressure!

Once you get to the middle hold your bag straight up and stop pressure and pull straight up. This will give you that nice finished tip.
Now you’re a decorating expert! Hope this helped!

Xo Courtney

Icing a Cupcake

Friday, November 27, 2015

Latest Instagrams

© SHE Degree. Design by FCD.