SHE Cooks: Gumbo!

Friday, January 29, 2016

Hey y'all so today I'm going to share a great soup recipe for you. With Mardi Gras right around the corner, the gumbo recipe is coming your way just in time!


With a mixture of chicken, sausage, and shrimp you're bound to please just about everyone with this one, and it is perfect for those chilly nights. My favorite part about this gumbo is it's not spicy! I don't like hot or spicy foods so I found a recipe I liked and tailored it to my needs! Adjust the below recipe to your needs. Ex - the original recipe calls for cayenne pepper, so if you like it hot add a 1/4 teaspoon to start. You can always add more, but you can't take away!

**I was so excited to eat this that I failed to take pictures while making it, but it's pretty easy!

Let's talk about what you'll need:

2 (14.5 oz) cans stewed tomatoes, undrained
1 small can of tomato paste
1 lb chicken thighs, cooked & shredded
1 large sausage link
1 (14.5 oz) can chicken broth
1 green pepper, chopped
1 large onion, chopped
2 stalks celery, chopped
1 tablespoon cajun seasoning (or more to taste)
1 tablespoon garlic powder
1 teaspoon ground black pepper
1 lb medium shrimp, peeled and deveined
white or brown rice

This is a great "dump and simmer" recipe. So these instructions are very simple!

In a big pot (or crockpot) add tomatoes, tomato paste, chicken, sausage, chicken broth, green pepper, onion, celery, and all spices. Stir to combine.
Bring this to a boil and then cover and let simmer for about 45 minutes. (if using a crockpot, cook this part on high for 2 hours)
After the 45 minutes, add your shrimp and cook another 10-15 minutes, or until the shrimp is warm.

Serve the gumbo over rice and enjoy!

I'd love to hear what you think in the comments!

xo Courtney


SHE Glows: The Ultimate Guide to Face Masks for Every Skin Type

Thursday, January 28, 2016


One of my all time favorite things is a nice, relaxing face mask (& maybe a large glass of wine accompanying it). If I'm have a little 'me time' or a Spa Night In with my girls, lathering on a thick mask not only makes me feel my best, afterwards my skin looks better than ever. 

The one thing that usually lead me away from face masks is the price. Some are upwards of $60 for one tiny jar! I know it sounds crazy but I've actually tried some of those masks *insert monkey covering his eyes emoji here*. Today I'm going to share all my favorites for every skin type to save you time and money! 


For Dry Skin: 

SAVE- Neutrogena Deep Moisture Night Cream | I get super dry skin in the winter and this has been a godsend! I use it every other night after I was my face and my skin feels fuller, more hydrated and I no longer have flaky, dry skin. It is a little greasy at first but your skin soaks it up after a few minutes. It tingles a little bit when you first put it on, which I like because then I know it's working! I snagged it for under $13 at Target. 


SPLURGE- GLAMGLOW Thirstymud | This one is a splurge and a recent purchase with a Sephora gift card I received for Christmas. I used it once and my skin looked baby fresh! I liked the 'mask' affect of this one but for the price, I will most likely stick to my Neutrogena night mask. Find Thirstymud here.


For Oily Skin: 


SAVE- Mint Julep Masque | This has been my go to for multiple years. $3 at Wal Mart and my favorite mask I've ever used. It goes on green and smells like heaven. As it dries it tingles and tightens. You can see you're pores being cleaned out and turn into black spots on your face! This always helps with my blackheads and shrinking my pores. Leave it on for 10-20 minutes, wash off with a washcloth. 


SPLURGE- Boscia Luminizing Black Mask | I loved that this one peeled off when it was dry! It also  works extremely well and it should with a $34 price tag for 2.8 ounces. It helped clear up some problem areas but much like the GLAMglow, I think I'll stick to my $3 Wal Mart find! 


For Acne:


Kate Somerville EradiKate Mask | Unfortunately I haven't found a 'save' version of this mask that I like as much as this one. It goes on as a liquid and quickly turns into a foam. The foam tickles as it cleans out your pores and 'puffs' up. After 10 minutes you rub the foam in and it turns into a cleanser. I was obsessed ever since my first time! I usually do this mask once or twice a week. Buy it here


For Under Eyes: 
This one is a DIY! Just wet under your eyes and rub on some ground coffee! Leave for about ten minutes. The caffeine makes dark circles lighter and helps reduce puffiness. 


What's your holy grail face product? I would love to try it! XO,
Riley


SHE Measures!!!

Wednesday, January 27, 2016


When you are cooking you need all kinds of measuring cups and spoons.  I wish there could be just one to measure every ingredient.  Here are the ones I use and I will show you how them.  

First, lets measure flour.  
To measure flour, you need to spoon it into the measuring cup.  You do not tap it down.  You spoon it in until it is over flowing. 

 
  Then you scrape of the excess with the flat side of a knife to give you the perfect cup.


When measuring brown sugar you always pack the brown sugar down with a spoon to get the correct measurement.  When measuring white sugar just fill the cup and scrape off the top to get a flat surface.
 
 
Most spices, this baking powder can and even the boxes of baking soda have a flat edge so you can scrape the excess off your spices or baking powder. 
 
 
I love this measuring cup for measuring liquids.  The measuring cup stays on the counter and you look down to see how much you need.  If the tick marks are on the side of the measuring cup, you are suppose to place the cup on the counter and get eye level to see if you are on the tick mark you need.  That is why sometimes you will see women bending down to get a correct read on a measuring cup. 
 
This is just a few quick tips about measuring.  Why does it matter?  Well, if you have ever tried a recipe and it didn't work or taste exactly right, it may because of measuring.  I hope this helps you in your adventures in the kitchen. 


Lisa

Busy Girl Desk Essentials

Tuesday, January 26, 2016


Hey Ya'll! Happy Tuesday, hope everyone is having a great week. I've mentioned before that I work in a corporate office, so I thought I would do a run down of my must have desk essentials that every busy girl should have.

1. Agenda/Calendar - I love agendas, especially this one. It allows me to jot down meetings, events, special dates, and I even use mine to meal plan.
  • I love for my desk accessories to match, so I coordinate notebooks and pens to match my calendar. This pencil cup is also adorable. 
2. Touch-Up Bag- Every SHE needs to stash a cute, but small, bag at their desk with items for last minute touch-ups before meetings. I have this one, and use it every single day. I include the following in mine:
  • Chapstick/Lipstick
  • Mini Lint Roller
  • Brush/Comb
  • Travel Hairspray
  • Advil/Tylenol
  • Nail File
You could also include makeup for touchups, oil blotting sheets, deodorant, etc.

3. Mints - Mints provide the same benefits of gum, just without the annoying "chomping".

4. Snacks - Some days are just plain busy, and lunch is not always an option. In the event it happens, I like to store snacks in my desk, preferably peanut butter crackers or a Clif/Luna bar. These Luna bars are my favorite; they taste just like a treat!

5. Extra Clothes - Most days I freeze in my office, so I always dress in layers. I keep a sweater at my desk just in case it's extra cold. Also, now that we're in the colder months more ladies are wearing hose or tights and the inevitable snag could occur. Storing an extra pair in your touch-up bag is always a good idea. Better to be on the cautious side than be cold all day!

6. Heater/Fan - My office feels like the inside of a deep freeze, so I always run my little heater. Just make sure not to catch your desk on fire!

Since we spend so much time at our office, it's important for our desks to be equipped with whatever we could need or want. Having your desk look nice is just an added bonus. What do you keep at your desk? Let me know in the comments section!

xo ~ Brittney

Snacking on Salsa

Monday, January 25, 2016

Hey Y'all,

Happy Monday ~  Hope today will be a great day!  This past week was a little cold and icy and we enjoyed a yummy soup and stew.  And I love the heartiness of them both. But some times you just want to snack on some yummy chips and salsa in the comfort of your home... in your pj's if you prefer or at least in some cute leggings and over sized sweatshirt (monogrammed of course).

I have a delicious and easy salsa recipe I am sharing with you today.  It is so yummy especially if you make it a day in advance.  The flavors marry together so well. I generally have several brands of tortilla chips on hand- Fritos or Tostitos have been our go to easy store brand. But lately we have really liked the seasoned South of the Border cantina chips.  Oh my they are thin and crispy and just enough seasoning to taste extra good. I warm them in the oven and serve with my homemade salsa.  Your guests will love them.  Be sure to set them out in a pretty serving bowl and you will be a hit.

Here's the recipe:  
1 (14. 5 oz) can Rotel tomatoes, w/green chilies
1  (14.5 oz) can tomatoes, crushed
           1/4 c chopped onion ( I use onion flakes)
            1/2 tsp garlic salt   1/2 tsp ground Cumin  1/4 tsp sugar
 
I put everything in my food processor, (You can use a hand mixer if you don't have a food processor) and mix together.  You want it to have a little texture from the tomatoes, not a liquid, so don't over mix.  You can add cilantro if you like, to your taste. (I don't care for it so I leave it out.)

If you can, I recommend making the recipe a day or so in advance. Store it in a glass container in your frig. It will stay fresh for several days ~ if it lasts that long.  It is so much better than "store bought" salsa and I like to think homemade = healthier.   Now the chips, probably not so much.  That is where moderation comes into play.


When you are ready to serve, pour it into a serving bowl along side your warm chips and enjoy. Isn't this one cute? Chips & Salsa bowl Chips and Salsa bowl  I found it on Amazon. Make a batch or 2 this week, it will be a yummy Super Bowl party snack.    Be sure to let us know how you liked it. We love hearing from you.
image via Amazon
xoxo, 
 
Amy 

SHE Cleans: Vinegar

Friday, January 22, 2016


Hey y’all! So January is typically a month where everyone adopts the “new year, new me” theory. I’m not judging because I’m definitely guilty of this year after year. Two of the changes a lot of people make are 1) trying to go all-natural and 2) cleaning/organizing better.

For this post I’m going to combine those two and share with you a few ways you can clean with a chemical free cleaner – vinegar!  First let us start with one thing that turns a lot of people (me!) off from using vinegar. The smell. Ugh. Solution: add a tiny bit of lemon oil to your spray bottle!

Okay... now we’re ready.

1. Clean your kitchen sink to make it look brand new! What you’re going to want to do is sprinkle baking soda all in the sink, then pour vinegar on top of the baking soda and let sit for a minute. When the bubbles start dying down, grab your brush and start scrubbing, then rinse. End result: shiny, clean sink (added bonus: your brush is now clean too!)

2. Mopping your floors. Make a spray bottle that is equal parts vinegar and water (this spray bottle will come in handy for everything else so definitely make it!)  Simply spray on the floor and mop away.

3. Clean your microwave!  Situation: dirty, grimy microwave (don’t be embarrassed, we all have them). Solution: fill a microwave safe bowl with 2 cups water and ½ cup vinegar. Microwave on full power for 3-4 minutes (it needs to boil). Keep the microwave closed for a few minutes to allow steam to loosen all the grime. Carefully remove the bowl and wipe your microwave clean.

4. Prevent mildew. Grab that spray bottle from earlier and spray your shower curtain and shower walls to help prevent mildew.

5. Countertops, kitchen table, highchairs, wooden cutting boards. Cleaning these items is great because the vinegar will kill germs but it doesn’t leave behind harsh chemicals to get on your food. Same concept as some of our previous items – spray on and wipe off. You may want a different spray bottle for this one that has a little more than half vinegar.

6. Dusting. Grab that half and half bottle and lightly spray on a rag. Then dust until your heart is content!


I hope you learned something today! Do you clean something with vinegar that I didn’t mention above? I’d love to hear about it in the comments so I can add it to my list!

xo Courtney

Skinny Coconut Margaritas: A Healthy SHE Way to Survive the Super Bowl

Thursday, January 21, 2016


I don't know about you guys but I think nothing is worse than snow in January. I am all for snow in December, at Christmas time when I'm loving snuggly, cuddly winter but once the new year rolls around I'm ready for some Spring time! I am stuck dreaming about warmer days and the only ice I want is an ice cold cocktail. 

Today I'm going to share how to fight your spring fever with a healthy, coconut margarita. At first I was skeptical.. coconut milk and tequila isn't my normal pair but once everything is mixed together, you'll slip away to island paradise. 


I often don't like to make my own mixed drinks at home. They either turn out horrible, make a huge mess or cost a fortune, luckily this one was none of the above & DELICIOUS. Besides the liquor, you can grab all the ingredients at the grocery store for under $10. They are light and refreshing, it's like a pina colada and margarita had a delicious, healthy child and now you can survive all the boys screaming at your TV during the Super Bowl (it's only a couple of weeks away!). 
I love a 'fiesta' themed get together and while you're quickly whipping up these yummy drinks, I think they would pair perfectly with some guacamole and shrimp bite size tacos -- both recipes here


I found this recipe via Pinterest and it makes 2 margaritas. I would suggest doubling or tripling the recipe depending on how many thirsty SHEs you are hosting. I can promise they'll want more than one! Next I'm going to try pairing it with pineapple juice and light rum for a take on actual Pina Coladas! 

Happy Friday Eve!! XO,
Riley 


SHE plans a party in 5 minutes!!

Wednesday, January 20, 2016


We spent plenty!


Perhaps you are a SHE who has it all together.  Perhaps you look at your calendar.  I want to be that SHE!  But I messed up!   I will let you in on a little secret.  I messed up, big time!  The days got away from me and I failed to plan a birthday for my littlest SHE.  The diva herself.  The little one who always does her makeup and has the best selfies.  So, what do you do in 5 minutes?  You take her to her favorite store.  OK, I took her to my favorite little girl store before she is too old to go.  I convinced her that a trip to the store with a shopping spree would be more fun than a houseful of giggling little girls! I so enjoyed it, and don't worry, she did too! 
 
She took her Bitty Baby that she named Sara. Sara was treated to a salon treatment.  She received a facial and massage (nice way to say a good scrub and neck tightening).  Sara has been well loved. While Sara will always have a place in our heart and bed we wanted to add a new friend to our collection.  She added the Doll of the Year, Lea to our family.  Lea also got a spa treatment....she got her ears pierced.  And of course we just had to get her plenty of accessories. I have to admit I love this store and all the people that work there.  They were all so wonderful.  The ladies that worked in the salon took such loving care my daughters doll.  The level of customer service in American Girl Doll Stores is incredible. Well at least it is in the Nashville, TN store!  We have also shopped in Chicago and the Mall of America and have always had a great time.  I may or may not have ran through the store yelling, "I want it all!!!"


After we shopped until we dropped, we headed to the Café.  I had called and made reservations for a birthday lunch.  The lady I spoke with on the phone was so helpful.   She helped this momma who had failed turn it all around! She said if you just show up, we will have the cake, ice cream and candles.  We will do it all and even clean up the mess!  She had me at we will do the cleaning.  Once we sat at our table and I realized I was hungry, I wondered if the food would be worth eating.  It was really good.  In fact, we want to go again and soon.  I loved the food presentation.  I wanted to taste everything and I did!! 


Spinach Artichoke Dip
The Turkey Club with fries
Parmesan Fries
Fondue (yogurt fondue, muffins and fruit)
The pink birthday cake tasted as good as it looks!


Loved having our dolls sit with us at the table!

I can't believe the baby of the family is 9!  She will be two whole hands next year.  She will be double digits.  This is probably the last time she will want a little girl birthday lunch. They grow up way too fast.  I hope I enjoyed it enough!  Can we just freeze time for a little while?

LISA B


SHE Attempted the Whole30

Tuesday, January 19, 2016


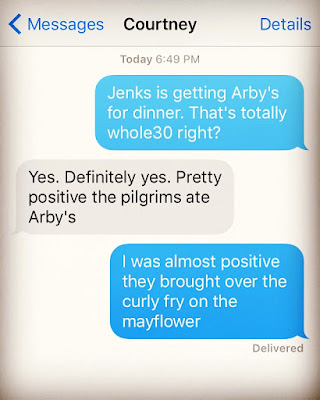
Hey Ya'll! Earlier this month, Andrew and I decided we were going to attempt the Whole30. If you aren't familiar with the program, it's a challenge to only eat "whole" foods. Fresh fruits, vegetables, meats and eggs for every meal, for 30 days. Here is the kicker, the only processed foods that you are able to eat are ones that you can recognize all of the ingredients in the label - it's exhausting just thinking about! When I explained it to friends, I told them it is basically the diet the Pilgrim's ate, minus bread. As you can imagine, Andrew and I lasted two days. Not even kidding. We decided it was too drastic of a change for our lifestyle. We did however incorporate more fruits and vegetables, cut back on sugar, and are exercising more. Today I thought I would share with you one of the recipes we tried out and actually really enjoyed while attempting to be Whole30 enthusiasts. 

Shrimp with Zoodles

1 pound shrimp
Zucchini (one medium sized per person)
Olive Oil
Salt & Pepper
Garlic
Onion

This recipe is super simple and I made it in under 30 minutes from start to finish. Begin by using a vegetable peeler or a "zoodle" maker on your zucchini.  I have this one and it was beyond easy to use! Once you have your zucchini noodles, they should look similar to the ones pictured below, pat them dry with paper towels.


In the meantime, preheat a skillet with a tablespoon or so of olive oil. Once it's nice and hot, add your "zoodles" and season with whatever you prefer. I used garlic powder and onion. Once they become soft and similar to the consistency of a noodle, remove from heat. Now, add your peeled, and de-vained shrimp to the skillet. Season them with salt and pepper, garlic and onion, and cook until they are pink. Once your shrimp are finished, add back in your "zoodles" and stir until well combined. It's as easy as that! I even convinced Andrew to try it, he didn't hate it - always a plus!


I hope you give this recipe a try, please let me know your thoughts! And just for giggles, the screenshot below accurately describes how I felt by the end of Day 2 of the Whole30.


xo ~ Brittney

Winter Car Care Tips

Monday, January 18, 2016

Hey Y'all,

Think we are going to get a "snow day" this week?  With the cooler temps come frosty mornings. If you park your car outside, there is a good chance that sometime between now and May you will go out to a frozen windshield ~ or worse. 
image via Yahoo
image via Yahoo
If you are like me, it will probably be on a day you are running out the door without a minute to spare. (Remember, it's cold and your bed was nice and toasty.)  You rush out to your car and find your windshield is frozen over.  Hopefully, you can hear your SHE whispering in your ear~ "You better clean your windshield before getting on the road! You will not be safe!"  (And a small patch cleared for the driver is not considered safe.)   But you don't have time for this!!  What's the quickest way to clear the glass so you can be on your way?  Of course a de-icer would be ideal, but that can get pricey, definitely need an ice scraper ( FYI a credit card works well in a pinch).   
Great tips here:  Clean Windshield Quickly 

What about frozen doors and locks? This is good information ~ How to fix frozen doors and locks
Did you read it all?  I tend to get a little anxious in these type situations....So I am not always thinking clearly. In other word, I would panic if I couldn't get my door open.   The best advice I think is to check ALL of the doors first!  Often times one side of the car will be some what protected from the weather and may be easily opened.  Whew! Now start that engine and turn up the heat. Turning your temperature to HOT and running your air conditioner works wonders at defrosting your windows too ~ once you get inside.  

I know lots of young ladies seem to live out of their cars and have extra clothes for going from school, to work to date night.  Winter weather can change quickly and accidents happen all of the time. Be sure you are prepared in case you are ever stranded in your car. Granted if you have a LOT of clothes, you might be able to layer up and stay warm. But if there is a chance you could be caught in the weather for any length of time, be sure to pack a few items in your car for safety.  
image via Yahoo

How to keep warm in your car in winter
1) Blanket
2) Coat, hat, gloves, socks, tennis shoes/boots
3) Snacks-nuts, protein bar, peanut butter
    crackers,water
4) Flashlight
5) Cellphone and charger 


image via Yahoo


I hope you will remember these tips and that
they help you be prepared. For now, let's cross our fingers for at least one or two snow days to stay home and play, drink hot chocolate and watch some old movies and not worry about the frozen car in the driveway because everyone is staying home. 


xoxo,        
      Amy


Latest Instagrams

© SHE Degree. Design by FCD.